Skip to end of metadata
Go to start of metadata

You are viewing an old version of this page. View the current version.

Compare with Current View Page History

Version 1 Next »

CataList integrates directly with the WordStock point of sale system to allow easy entry of new catalogue items and orders into your WordStock database. Follow the instructions on this page to set up the integration and learn how to export your orders to WordStock.

Watch our webinar about this topic! (Length: 18 min)

https://youtu.be/utAPRoAkHh4

Request CataList module installation in WordStock

The first step is to let WordStock know you want to install the CataList order import feature. They will install the module for your account and let you know when you can begin importing orders and catalogue records from CataList.

Enable WordStock features in CataList

After WordStock has installed the module, go to CataList and turn on the WordStock features for your store. You must have Account Manager access in order to enable this feature in CataList – let us know if you need your access upgraded or help getting set up!

global_navigation.png

To enable WordStock features in CataList

  1. Log in to CataList, then your name and select Administration from the menu.

retailer_admin_wordstock.png
  1. In the Administration tab, click the Point of Sales System dropdown list and choose WordStock.

  2. If prompted, enter any additional data points needed to create the files that WordStock can import. See Add store numbers for details.

  3. Set up the FTP location where WordStock can pick up your CataList order files. See Set up an FTP folder for details.

Once you have completed the setup, you can use CataList to add custom WordStock data points. The remaining documentation outlines how to add WordStock data points and export orders in CataList, and how to import orders into WordStock.

Add store numbers

If you have more than one store location, CataList needs to know the way you identify your stores in WordStock in order to match up order quantities to the correct store in the exported files.

retailer_store_locations2.png

To add a store ID to an existing location

  1. In the Actions column of the Store Location table, click Edit.

  2. Enter the Store ID and click Save.

The Store ID column for the selected store is updated.

Set up an FTP folder

Wordstock will pick up your order files from a directory on the CataList FTP. When you export a file, CataList automatically posts the export to the FTP directory you set up using the following process.

To set up a directory on the CataList FTP site

  1. Under the Point of Sales System dropdown list, click Start set-up. The FTP Set-up displays.

  2. Enter a password that is at least 8 characters in length, then re-enter the password in the second box to confirm it.

  3. Click Save to create the FTP directory.

The new FTP directory name is taken from the first 20 characters of your account name, without any spaces or special characters.

CataList provides a confirmation message letting you know that your directory set-up was successful.

You will need to enter your FTP credentials in WordStock so that WordStock can pick up files from CataList for import.

To set up the FTP in WordStock

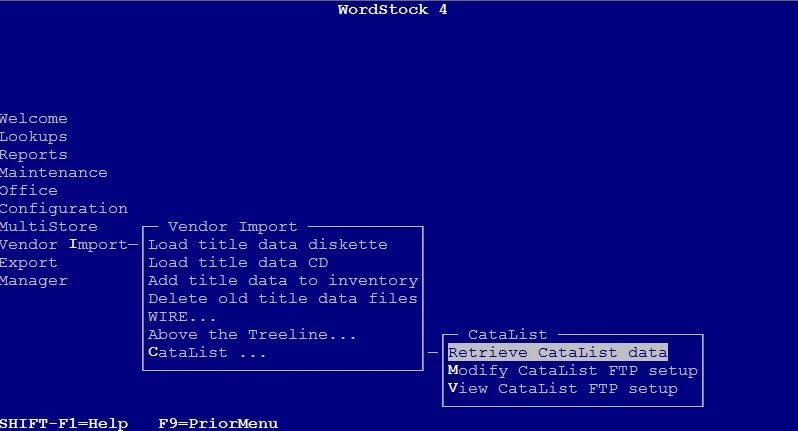
1. Log in to WordStock. In the Vendor Import menu, choose CataList.

2. Select Modify CataList FTP setup.

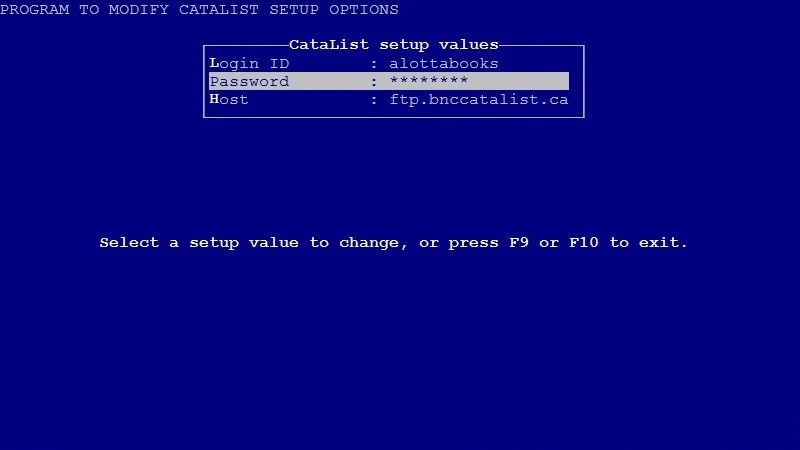
3. Enter the default WordStock password to modify CataList FTP setup.

4. Enter the CataList FTP username in the Login ID space, and the password you set in the previous step in CataList into the Password space.

Your FTP setup is complete.

Enter custom WordStock data points

title_details_wordstock.png

Once the WordStock export option is set up, you'll be able to start adding custom title-level data that will be pulled into your WordStock exports.

On the Title Detail page, there is a new accordion box you can open and close. Custom data can be entered for the following data points:

  • Product #

  • Section 1

  • Section 2

  • Publisher #

  • Lookup

  • Comments

Export orders

The WordStock export is listed alongside the Excel and CSV order export options.

order_detail_wordstock_export.png

1. From the table on the My Orders page or the order summary on the View Order page, click Export. There is a new option to export to WordStock in the list of exporting options.

2. Select WordStock to open the WordStock export form.

3. Fill in the additional fields that WordStock needs to import your order, like the discount amount on the order, the publisher number, and a purchase order number, if you haven't already supplied one.

4. (Optional) Submit the order to your sales rep so that they can view it directly in CataList.

Note: No further changes can be made to submitted orders.

5. (Optional) Set your order to close automatically after export.

6. Click Export to apply these data elements to your order and create the file for WordStock to pick up.

CataList displays a confirmation that your export has been created, and the name of the file that was posted to your folder on the CataList FTP. The Exported to WordStock column on the My Orders page shows the export date for that order.

If for any reason you are checking or troubleshooting export files on the FTP, you can identify files by their naming convention as follows:

CATL_[POnumber]_[timestampYYMMDDHHMMSS].txt

Example: CATL_8888888_170623095428.txt

Import your order files to WordStock

The last step is to trigger file pick-up from the WordStock side.  

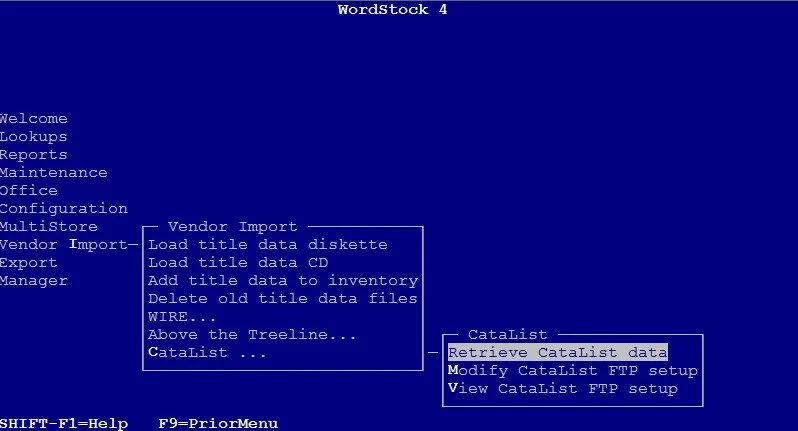
1. Log into WordStock. In the Vendor Import menu, choose CataList.

2. Select Retrieve CataList data.

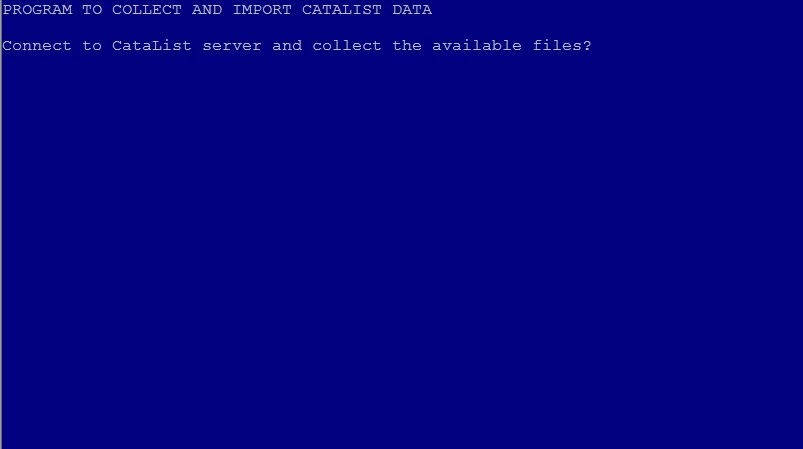
3. When prompted to connect to the CataList server, enter "Y" to connect to CataList and download files.

If there are no files available, you'll see "No CataList files available for collection".  

If there are files available, they will download and process. You'll be prompted to view/print a log of actions upon completion.

  • No labels